Ever found yourself frustrated with pans that can’t stand up to the culinary heat, losing their non-stick charm or warping under the weight of regular use? Wave those woes goodbye and welcome a kitchen revelation – the Blue Diamond Pan.
This superstar pan, known for its extraordinary non-stick prowess and hardy, diamond-infused design, is ready to make your cooking adventures easier and more enjoyable.
If you’ve got this sapphire-hued hero in your kitchen—or if you’re considering investing—this guide is here to help you make the most of every meal with some indispensable Blue Diamond Pan instructions.
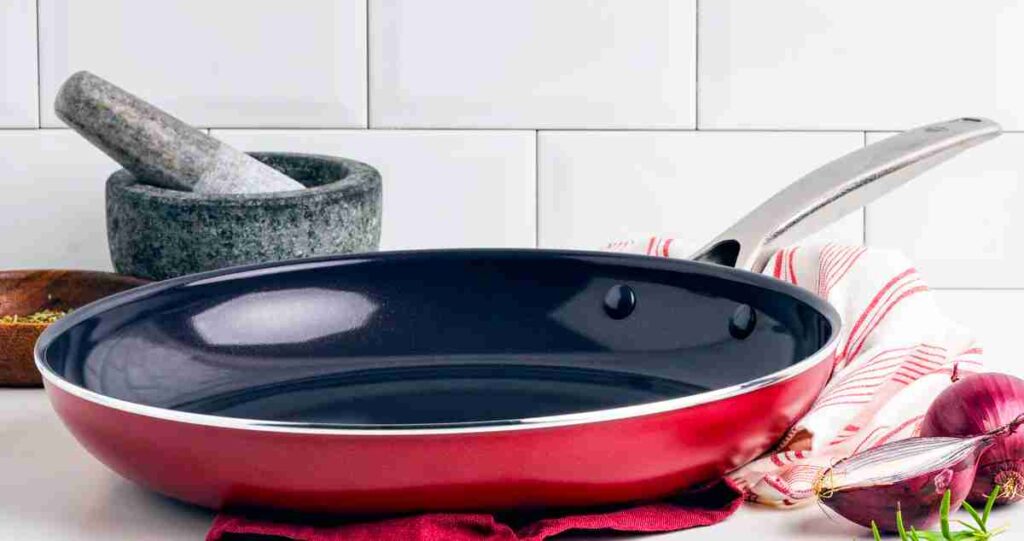
The Blue Diamond Pan
The Blue Diamond Pan is no ordinary kitchen tool. It’s a powerhouse designed to elevate your cooking experience by combining durability with high non-stick performance. Here’s a closer look at what makes this pan stand out:
- Non-stick Performance: The Blue Diamond Pan is engineered to deliver an unparalleled non-stick experience. The diamond-infused coating provides an extremely hard and durable cooking surface and ensures that food slides right off the pan without needing a lot of oil or butter. This makes cooking and cleaning a breeze.
- Enhanced Durability: The Blue Diamond Pan prides itself on its robust construction. It’s built to last with a sturdy forged base that prevents warping, a common problem with other pans. The diamond-infused ceramic coating is also impressively resistant to scratches and wear, so you can count on it to maintain its quality for a long time.
- Toxin-Free Design: Your health and safety are the utmost priorities when designing the Blue Diamond Pan. The pan is free from harmful chemicals like PFAS, PFOA, lead, and cadmium, making it safe for you and your family. It’s a pan you can use with peace of mind, knowing it’s not adding anything harmful to your meals.
- Heat Distribution: One of the secrets to cooking food perfectly is even heat distribution, and the Blue Diamond Pan delivers that flawlessly. The high-quality materials used in the pan construction allow it to heat quickly and evenly, helping to reduce hotspots that can scorch food and ensuring that your meals are cooked uniformly.
Proper Unpacking and Initial Cleaning:
When your shiny new Blue Diamond Pan arrives at your doorstep, the excitement of unboxing it and making your first meal can be compelling. But before you dive headfirst into your culinary adventure, it’s essential to unpack and clean the pan correctly.
A. Unpacking Your Blue Diamond Pan:
- Carefully open the package and remove the pan.
- Be gentle to avoid scratching the surface.
- Discard or recycle any packaging materials responsibly.
- Ensure you also keep any product information or warranty cards with your pan for future reference.
B. Initial Cleaning Tips:
It’s crucial to clean your pan before its first use thoroughly. This removes any potential residues left from the manufacturing process. Here’s how to do it:
- Wash with Warm Soapy Water: Use a soft sponge or cloth to clean the pan with warm soapy water. Avoid harsh detergents or abrasive materials, which could damage the non-stick surface.
- Rinse Well: After washing, rinse the pan thoroughly under warm water to remove all soap residues.
- Dry Thoroughly: Use a soft towel to dry the pan completely. It’s essential to ensure it’s entirely dry before you start cooking. You can also let it air-dry if you prefer.
Once your pan is clean and dry, it’s ready for action! It’s recommended to keep it in a dry, clean place, and if possible, avoid stacking other cookware on top of it to prevent scratches. Store it properly when not in use to maintain its longevity. With these simple steps, you’re well on your way to creating culinary masterpieces with your Blue Diamond Pan!
How to use Blue Diamond Pan properly?
You’ve unpacked and cleaned your Blue Diamond Pan – great! Now, it’s time to explore how to use it. Here are some basic guidelines to follow:
A. Preheating the Pan:
The Blue Diamond Pan is designed to heat quickly. Start your cooking on low to medium heat to allow the pan to warm up evenly. Preheating the pan properly will ensure your food cooks evenly and helps maintain the non-stick surface.
B. Choosing the Right Utensils:
To protect the non-stick surface, it’s essential to use the right utensils. Avoid using metal utensils that can scratch the surface of the pan. Instead, opt for wooden, silicone, or heat-resistant plastic utensils.
C. Adjusting the Heat While Cooking:
The Blue Diamond Pan is designed to retain heat well, so cooking on high heat settings is unnecessary. Stick to low and medium heat settings for most of your cooking, and only use high heat when necessary, such as when boiling water. Using high heat can damage the non-stick coating over time.
D. Avoid Overheating Your Pan:
- Never leave your pan on the burner without food or liquid, as this can lead to overheating, which can damage the pan.
- If your pan accidentally overheats, let it cool down naturally.
- Do not immerse a hot pan in cold water, which can lead to warping.
Cooking Techniques Specific to the Blue Diamond Pan:
- Searing Meats: One of the many advantages of your Blue Diamond Pan is its ability to heat up quickly and retain heat. This makes it perfect for searing meats. To achieve a great sear, pat your meat dry, season it, then place it in your preheated pan. Keep the pan open to ensure a proper sear instead of steaming.
- Sauteing Vegetables: The even heat distribution of the Blue Diamond Pan makes it a champion for sauteing vegetables. Add a little oil, toss in your veggies, and stir occasionally for an even, crisp-tender result.
- Preparing the Perfect Eggs: The pan’s non-stick surface makes it ideal for cooking eggs in any style – fried, scrambled, or omelette. Remember to use low to medium heat and a bit of butter or oil to achieve the best results. You’ll be impressed at how effortlessly the eggs slide off the pan.
- Making a Stir-Fry: Stir-frying is a breeze with the Blue Diamond Pan. Its high heat retention and non-stick properties make it perfect for quick, high-heat cooking. Toss in your ingredients, keep them moving, and you’ll have a delicious stir-fry in no time.
Care and Maintenance:
- Cleaning Your Blue Diamond Pan After Use: Cleaning your pan after every use is essential to keep it functioning well. Avoid harsh cleaning agents or abrasive scrubbing pads, which can damage the non-stick surface. Wait until the pan has cooled down, then wash it with warm soapy water.
- Proper Storage to Ensure Longevity: When storing your Blue Diamond Pan, avoid stacking other cookware directly on top of it, as this can lead to scratches and damage to the non-stick surface. If you need to stack your pans due to limited storage space, place a soft cloth or a pan protector between them.
- When and How to Re-Season Your Pan: While the Blue Diamond Pan is designed to be long-lasting, there may be times when you need to refresh the non-stick surface. This process, known as re-seasoning, involves applying a thin layer of cooking oil to the pan and heating it gently. You’ll know it’s time to re-season your pan if food starts to stick to it more than usual.
- Tips to Avoid Common Mistakes That Shorten the Lifespan of the Pan: Avoid using metal utensils with your Blue Diamond Pan, as they can scratch the non-stick surface. Also, avoid exposing your pan to drastic changes in temperature, such as moving it directly from a hot stove to a cold sink, as this can cause warping.
 Conclusion:
There you have it! Armed with these handy instructions and tips, you’re well on your way to mastering the Blue Diamond Pan and achieving a cooking experience like no other.
Remember, it’s not just about the pan’s robust construction or incredible non-stick performance; it’s about the culinary journey you embark on with it. Whether you’re sauteing vegetables, searing a steak, or making the perfect eggs, your Blue Diamond Pan will make it easier, healthier, and more enjoyable.

- What size pan is one and a half (1.5) quarts? - June 8, 2023
- Le Creuset saucepan sizes: Choosing the Perfect Pan - June 8, 2023
- Blue diamond pan instructions: Step-by-Step Guide - June 8, 2023